Monday, 17 January 2011

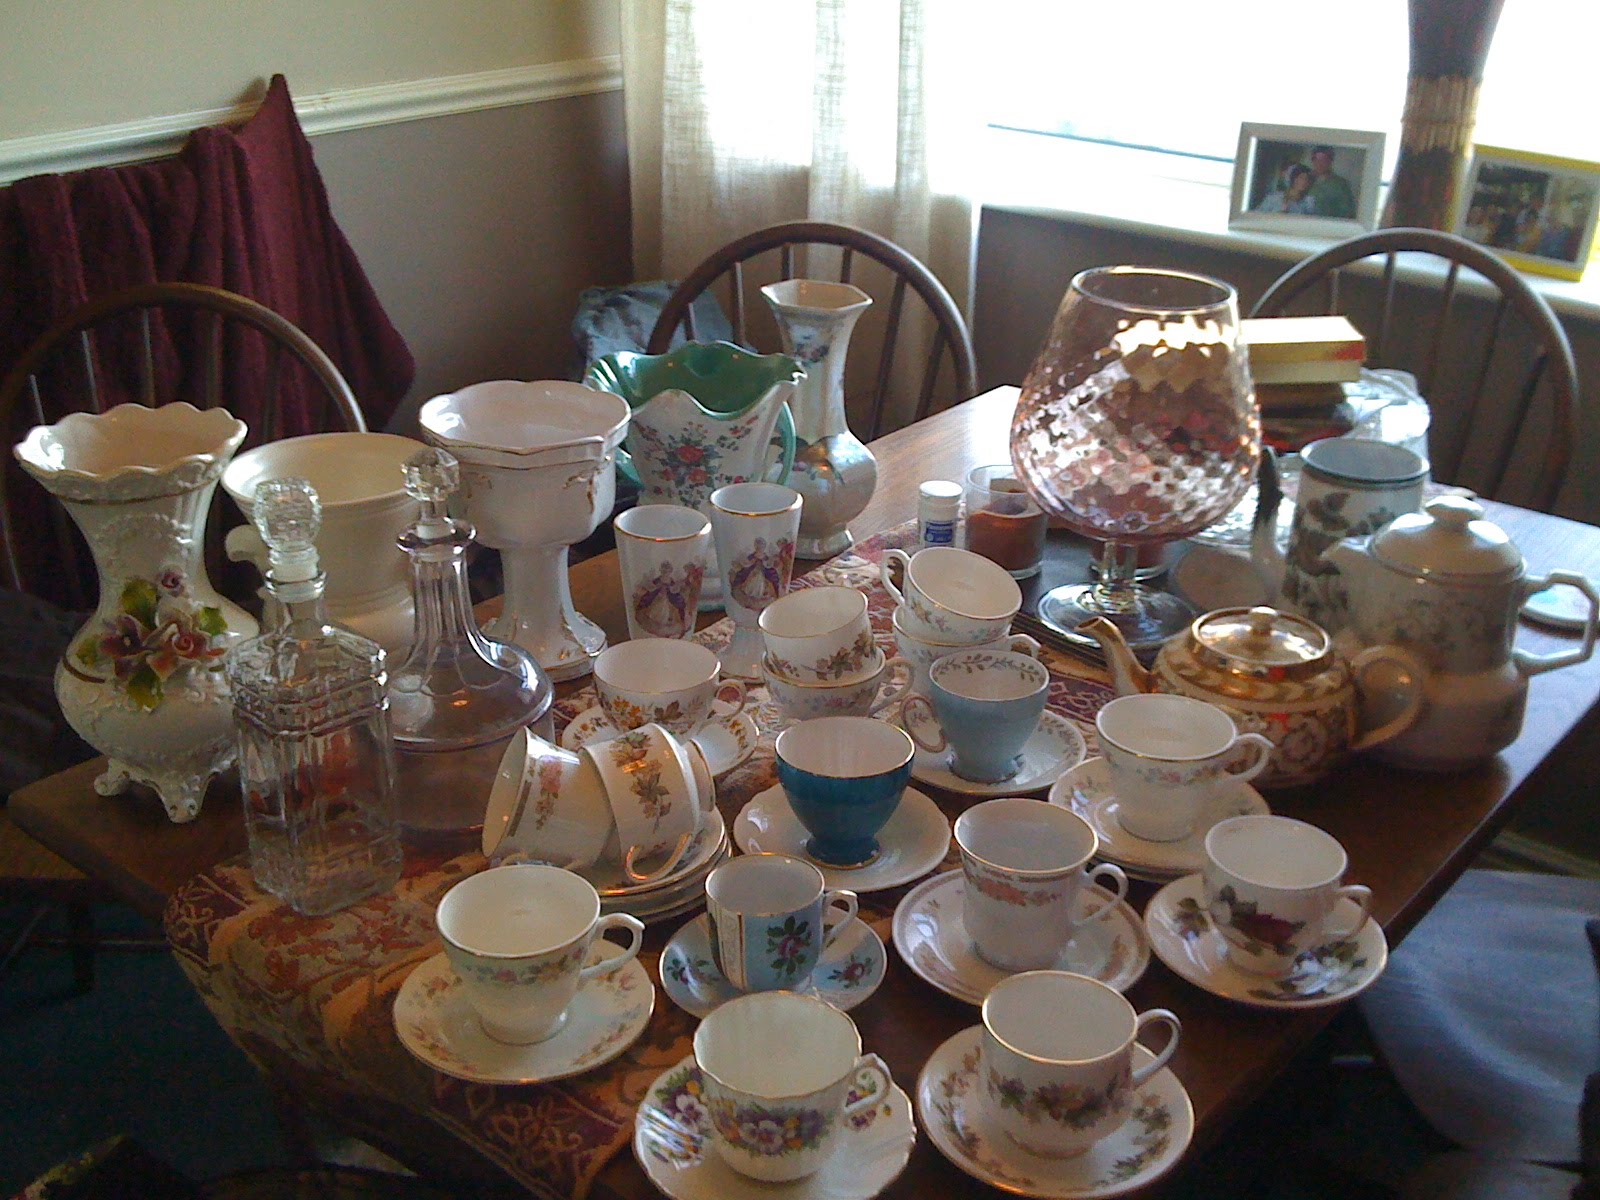
This is what 62 tea cups look like....


If you ever wanted to see what 62 tea cups look like all in a row then this is it!

We're inviting exactly 62 people to the wedding, so i've ticked operation "find vintage tea cups" off my to-do list. I am going to buy another 4-5 if I see them though: that way i'll have spares just in case some get broken!

Other successful missions we've achieved this month are:
-We've booked a DJ, and started putting together our playlist.
-We've bought our groomsmen gifts and i've packaged them up (with personalised tags)
-I've found the car I want (we're going to view and hopefully book it in a fortnight)
-The table place cards are finished
-We have appointments with a florist and chair cover company
-I bought the last bits I needed for my make up bag
-We have new luggage for our honeymoon (Thank you Debenhams sale!)

Love, Tor x

Sunday, 16 January 2011

The brooch bouquet: The tutorial

You will need:
Approx 75 brooches (or rings, earrings or anything else you can wire the back of)
Approx 150 Pipe cleaners (2 per brooch)
Approx 75 lengths of gardening wire
Florists tape (I used a roll and a half)
Masking tape
Wide ribbon/Trim to finish (I used white but you can choose any colour you want!)
Pliers

1. Wire the flowers
I'm sure there are loads of different ways of making a brooch bouquet, but this is how I did it! I treated each individual brooch like a separate flower (see above). I made the flowers by taking the wire and (using the pliers) wrapping it around the clasp of the brooch so that it was pretty secure and the length of the wire hung down like a stem. This didn't give enough security and often wasn't tight enough though, so I then wrapped a pipe cleaner around each side of the clasp and then twisted these around the length of the wire, making the stem thicker and more secure. Then just to make the flowers look pretty (and more like flowers!) in case you could see any of the stem once i'd constructed the bouquet, I took the florist tape and used it to completed cover the stem, like to you see above.

Doing this for each of your brooches is a pretty lengthy process and it took me up to 10 minutes to do each one, depending on how fiddly the clasp is. My tip to make this less grueling is to do each "flower" as you buy the brooches, so you don't have to sit down and do 75 all at once.


2. Assemble the bouquet
Once you have your 75 flowers constructed, its time to start putting the bouquet together. This is tricky, especially if you want a traditional rounded shape like I did, so it's best to take it slow to get it right. I started by laying out all the brooches and seeing which ones would fit together nicely. Then I started putting them in little clusters of 3 to 4 brooches to see how they would look. Once I had my little cluster looking good, I twisted the wires of those 3/4 brooches around each other, so that they were secure in the position I wanted them to be, without using any glue. I started with the first cluster I wanted at the top centre of the bouquet and worked down and round.

If anything needed repositioning, or the bouquet was starting to fall flat I turned it upside down and started 'fluffing' it up and pushing the brooches back into the positions I wanted to be in: it's easier that way. What I ended up with was a nice looking bouquet, but with an ugly looking twisted stem.

Depending on the length of wire you use, you might have to shorten your bouquet at this stage I did!) We just used wire cutters to trim though each flower (I got Mike to help with this, as it needed a stronger arm than mine!)

Now is the time for the masking tape! To cover your ugly stem, and give you an even surface for your ribbons, wrap masking tape around the stem as tightly as you can, making the stem as compact and even as possible.

3. Trim your bouquet
This was the bit I found hardest, and i'm not going to give a full tutorial on this, because if you google 'wrap bridal bouquet' you'll find lots of much better video tutorials to follow: that's what I did!! The lace trim around the flowers (which of course you don't have to have but I liked as it added to the vintage feel) was a case of trial and error. I pushed my lace under the flowers and into the position around the bouquet that I wanted. Then using a needle and thick white cotton I stitched it into place: I used the brooches as anchors for this (because I had no other fabric to stitch to!!) and stitched around them and their stems. It seems to have worked well and feels pretty secure.

Et voila! The brooch bouquet is complete!

Sorry I didn't take more photos during the construction process, but I hope that makes sense! Good luck making your own brooch masterpieces!

Love, Tor xxx

NOTE: I'm sure if you didn't mind ruining the brooches there would be a much easier way of doing this, using hot glue. This method just didn't work for me, because a lot of the brooches have sentimental value, and I didn't want to damage them.

Sunday, 9 January 2011

My brooch bouquet is finally finished!!

Hi guys,
After months spent gathering brooches, wiring them into individual flowers and arranging them into a bouquet shape (not easy when you're working with metal and wire) my brooch bouquet is finally finished. Woohooo!!!!
I love it, and really don't think it could've turned out any better. It's slightly smaller than I had originally had in mind, but it's soo heavy that I decided it was time to stop, before I couldn't pick it up any more!

My original thought was that I would wrap it in blue ribbon: the same colour as the bridesmaids dresses, but I decided that with the coloured aspects in my own outfit it might clash, so I went for the white of my dress instead. I think that was a good decision, and I love the way the vintage lace and pearl trim looks against the vintage brooches.

I've taken photos throughout the process of putting this together, so i'll definitely post a tutorial soon, if you're looking to make one of these yourself.

Love, Tor xx

Thursday, 16 December 2010

Update: Every girl needs her mum

Hi guys,
It's been a long time since i've updated, and progress on the wedding planning has really slowed down this month, as we've been taking a break and focusing on Christmas instead: you can't assemble a tree and make mince pies by the thousand and buy and wrap a million presents whilst stressing about a wedding at the same time!But the cut outs for the photobooth are complete: here are pics of how they looked before I took them home, where my amazing dad and grandad are cutting the faces out and building frames around them so they stand up. I can't wait to get home for Christmas to see how they look (as well as because I can't wait to get home for Christmas!)

When I went home last month to visit my folks and take the cut outs up for their final creation, mum and I had three days of wedding planning and crafty fun. We choose the ribbon colours for the confetti cones (which mum is making herself) got some great inspiration for the reception, and went to Horncastle, a local antiques town, where we picked up lots of the remaining tea cups needed for the place settings, as well as tea pots for our floral arrangements on the tables, old fashioned vases, for the flowers in the bar area and cut glass bottles for our homemade vodka to sit in on the bar. We also got a giant goblet/vase which I loved, and which we will be using for the sweetie buffet:
It will brilliant to have the time with mum to talk non-stop about the wedding and make plans. My mum is ridiculously crafty (much more so than me) and it was great to hear all her ideas (and of course give her a big list of extra things to do!!!) It was a massive weight off my shoulders to know that my mum could craft half the ideas I could barely explain in my head (and didn't think they were crazy!) Like the title says: every girl needs her mum!

All in all it was a massively successful trip, and I can't believe I didn't write it up sooner!
Love, Tor xx

Wednesday, 10 November 2010

DIY Photobooth/guest book hybrid!

Wow, I can't believe it's been a month since my last post! We've had a really busy time, with loads of amazing progress made, so I must keep writing these updates. My latest DIY project is currently in progress, and it's one i'm really proud of, so I just had to share its evolution so far:You know those things that have no name, those things you put your head through and have your picture taken when you go to the fair? Well we really wanted to have those for our wedding guest book. So much more interesting that a load of signatures! We intend to have one for the boys and one for the girls: An Alice and a Mad Hatter. The painting of the alice is complete, whilst the hatter is still a work in progress. The final picture is the finished Alice:
We took 6 ft by 2 ft thick gauge MDF boards, and painted them pale pink then left them to dry. Then it was time to get creative and draw on the Alice with pencil. Once I was happy with the drawing I painted in the block colours, one colour at a time. Again, this was left to dry. Then came the trickiest bit of this crazily simple process: creating the block cartoon effect by going around the painting in a thick black marker pen. Simples!

The Hatter has had his background painted, and is just waiting for me to get creative with my paints and pencils! At the weekend both boards will be making a trip to Lincolnshire, where Daddy and Grandad Fabfrocks will be cutting out their faces and building them A frames so that they stand up independantly, and safely.

Without sounding to vain, i'm really pleased with how this one has turned out. I just hope the Mad Hatter looks as good when i've finished him!

Love, Tor xx

Monday, 11 October 2010

Guest book/Photo album/Keepsake box: Done!

I've been looking for the gift box/photo album/keepsake box set for ages, but haven't seen anything I wanted: I didn't want something with "wedding" embellished across the front. Then I toyed with something Alice themed, but didn't want something that garish to sit on my coffee table for all eternity.
Tonight Mike and I popped into Paperchase to check out the Christmas stuff (which I always absolutely love!) and I saw this and fell in love. Silver leather with flocking embossing: what's not to like?! It's very simple, and very chic, which is just what you want in something you're going to keep forever. It's more surprisingly sophisticated than I expected I would like but in the flesh it's lovely: the grain of the leather is stunning!
On the subject of Paperchase, this is the display they had behind the tills: milk bottles with pages torn from books wrapped inside as scrolls. I thought it looked really effective, and if I have any nooks and crannies at the venue that need filling this would be a cheap but eyecatching way of doing it!

Love, Tor xx


Wednesday, 6 October 2010

It's the little things...

Hi guys,
I've been quiet, but that doesn't mean I haven't been busy! I've had lots of new ideas over the past couple of weeks, including handing out our 'drink me' bottles of booze at the entrance to the venue (instead of putting them on the table) so that guests have to "drink and shrink" to get in, just like Alice did! I've also had a great idea for a photo guest book that's quite ambitious, and involves building a head-in-hole photobooth, similar to the kind you would find at a fair!

Unfortunately, i've also been busy, so no new big decisions have been made, no more vendors chosen. Instead i've been busying myself with little projects, so that I feel like i'm achieving something towards the wedding, without overwhelming myself!

Today i've been working on the labels for the sweet jars, to go on the sweetie buffet:

They're exactly what I wanted: personalised with our names and date, vintage looking, and still inkeeping with the wonderland theme. I've only made four so far, but now I have the template ready they won't take long to finish off! Next job is to go to ikea and buy the jars to stick them on....

Love, Tor x